How to open .md files on a Mac
Six ways to open a Markdown file on macOS, what each one is actually good for, and how to stop double-clicking a README from launching an IDE.
A .md file is a plain text file with a convention attached. The convention — Markdown — says that a line starting with # is a heading, that **this** is bold, and that a block fenced in backticks is code. macOS knows about the plain text part and nothing about the convention, which is why double-clicking a README tends to end in disappointment.
Here is every reasonable way to open one, roughly in order of how much ceremony each involves.
1. Press Space in Finder
Select the file and tap the space bar. This is Quick Look, the same panel that shows you images and PDFs without opening an app, and it is far and away the fastest route — no launch, no window, no tab.
Out of the box it shows you the raw text: asterisks, pipes, backticks and all. macOS has no Markdown renderer of its own. What it does have is a documented way for an app to add one: a Quick Look extension. Install an app that ships one, open it once so the system registers the extension, and Space starts rendering the file properly.
Hem is one such app, and the Quick Look guide goes through how the mechanism works, including what to do when two apps both want the job.
Good for: reading. Scanning a directory of notes, checking what a CHANGELOG.md says, glancing at a spec before a meeting.
Not good for: editing. Quick Look is a viewer; nothing you do in the panel changes the file.
2. Open it in a dedicated Markdown app
Double-click, or drag the file onto the app in your Dock. A viewer opens a window, renders the page, and — depending on the app — lets you edit it.
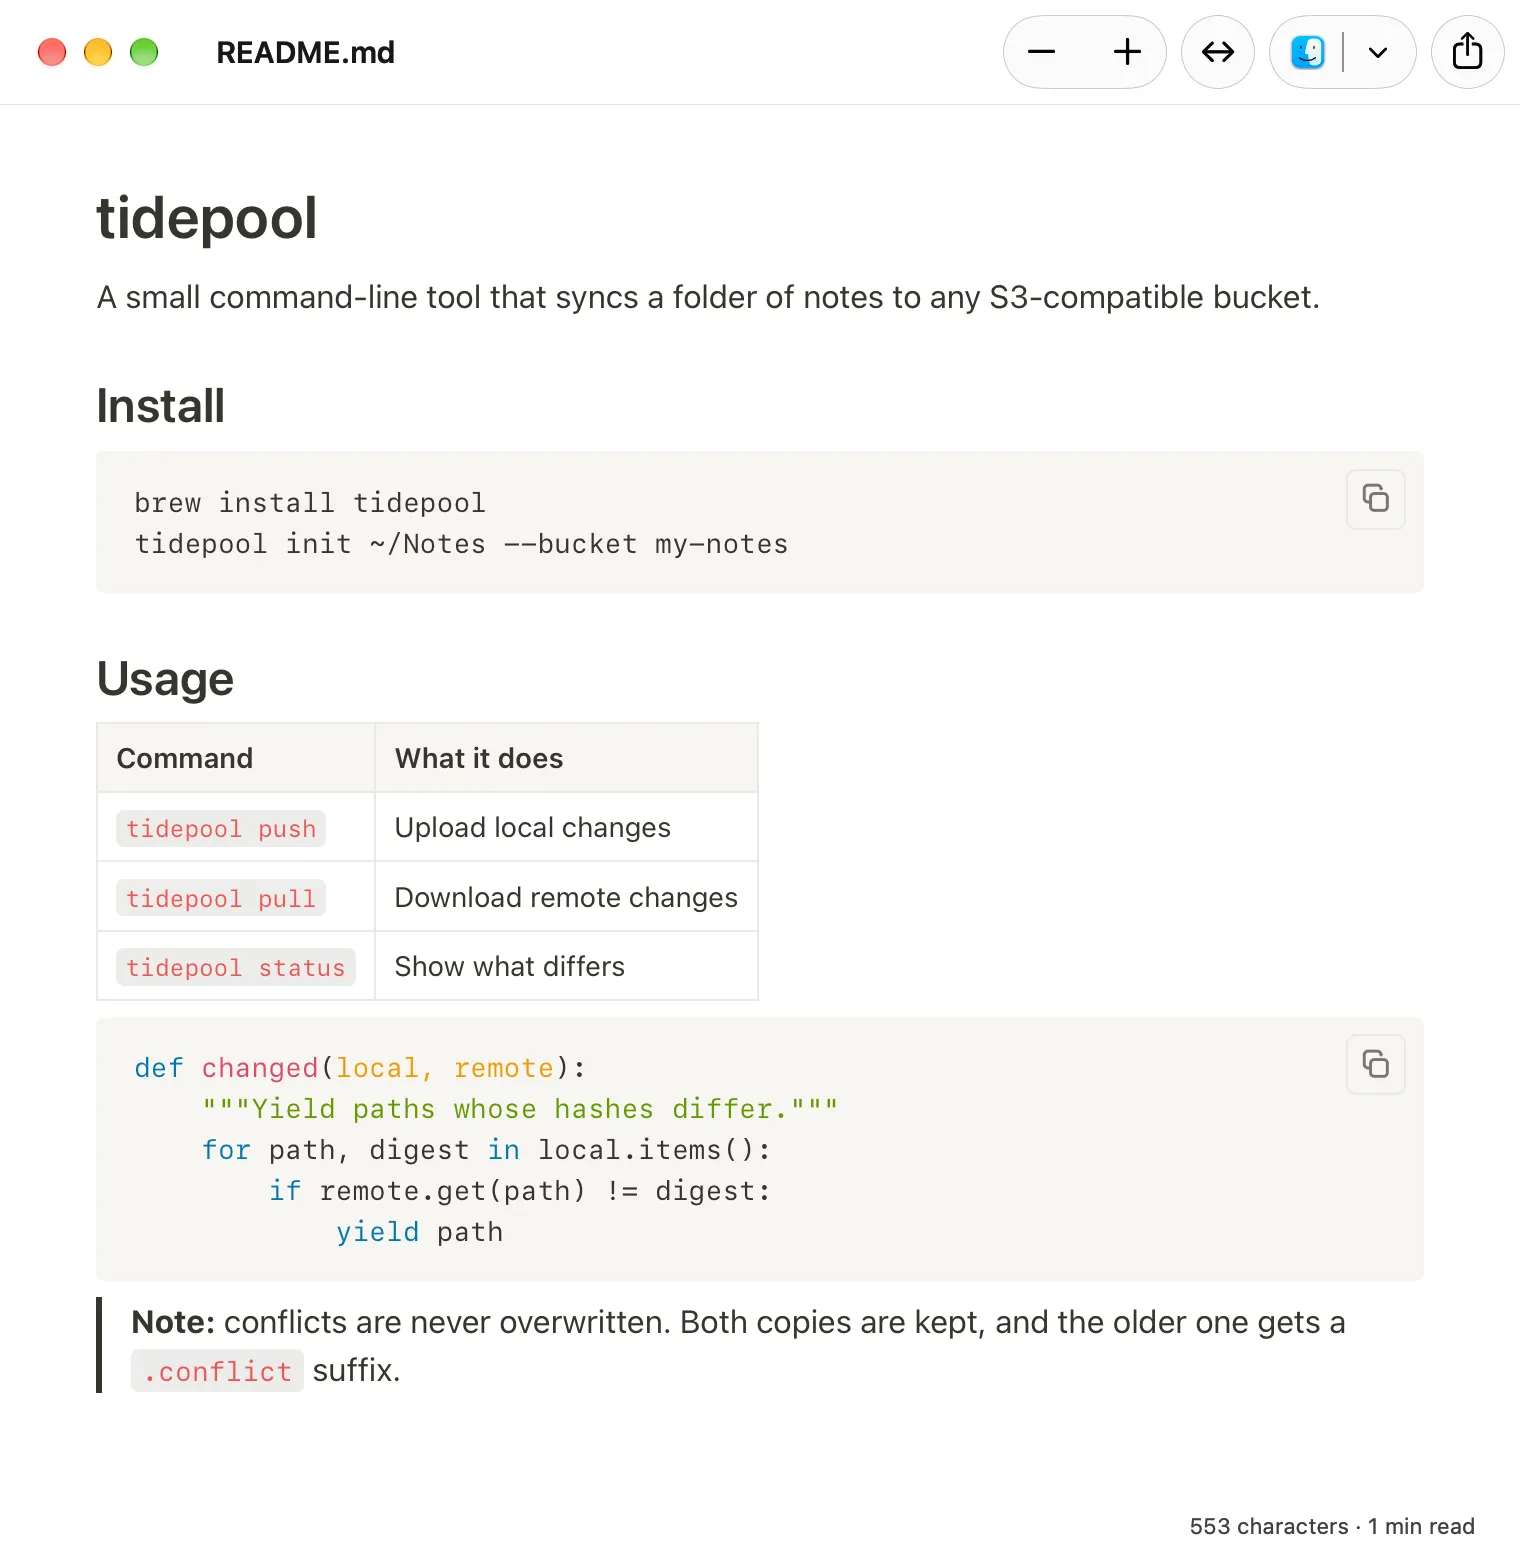
This is the option worth setting up properly, because it decides what happens on every future double-click. To change the default:
- Select any
.mdfile in Finder. - Press ⌘I, or right-click and choose Get Info.
- Under Open with, pick the app.
- Click Change All… and confirm.
macOS will use that app for every Markdown file from then on. Some apps offer to do this for you on first launch; the good ones ask rather than assume.
Good for: reading and editing, repeatedly, on files that live on your disk.
3. Open it in your code editor
VS Code, Zed, Cursor, Xcode, Sublime. All of them show Markdown as source, most of them can show a preview beside it — in VS Code, ⌘K then V opens the preview pane.
If the file is part of a repository you are already working in, this is usually the right answer, because the editor is open anyway.
If the file is not — if it is a note on your Desktop, or a spec somebody sent you — you are starting a large process, waiting for an extension host, and possibly being asked whether you trust the folder, all to read four paragraphs.
Good for: files inside a project you have open.
Not good for: anything you just want to look at.
4. Open it in TextEdit
Right-click the file, choose Open With → TextEdit. It works, it is already installed, and it shows you exactly what is in the file, which is sometimes precisely what you want — checking whether that list uses - or *, for instance.
TextEdit will not render the Markdown. It has an RTF mode, but Markdown is not RTF, and pointing one at the other only produces a file with asterisks in it.
Good for: seeing the raw source without installing anything.
5. Open it from the Terminal
If you are in a shell already:
open README.md          # hands it to the default app
open -a TextEdit README.md
qlmanage -p README.md   # the Quick Look panel, on demand
For reading in the terminal itself, glow renders Markdown as styled text right in the shell, and bat README.md gives you the source with syntax highlighting and a pager:
brew install glow bat
glow README.md
glow is genuinely pleasant for long files. It will not draw you a Mermaid diagram or typeset a formula, because a terminal cannot, but for prose it is excellent.
Good for: people who are already in a shell.
6. Paste it into something online
There are web-based Markdown viewers. They work.
They also mean the contents of your file leave your machine, which for a work specification, an internal runbook, or anything under an NDA is a decision rather than a convenience. If the file is a public README, fine. Otherwise, one of the five options above does the same job without the upload.
Which one to use
| Method | Renders | Edits | Launch cost | Works offline |
|---|---|---|---|---|
| Quick Look, with an extension | Yes | No | None | Yes |
| Dedicated Markdown app | Yes | Usually | Small | Yes |
| Code editor | In a pane | Yes | Large | Yes |
| TextEdit | No | Source only | Small | Yes |
glow in the terminal |
Text only | No | None | Yes |
| Web viewer | Yes | Sometimes | None | No |
Most people end up with two of them: Quick Look for reading, and one editor for writing. The trick is making sure the reading one is genuinely instant, because that is the thing you will do twenty times a day.
When a .md file opens as plain text anyway
A few things go wrong often enough to be worth listing.
The extension is hidden. Finder hides known extensions by default, so notes.md may display as notes. Press ⌘I and check Name & Extension.
The file is actually .md.txt. Some download paths add the second extension. Rename it and macOS will re-evaluate what it is.
You installed a Quick Look app but never opened it. macOS registers an app’s extensions on first launch, not on copy. Open the app once from Applications.
Two apps offer a Markdown preview. macOS picks one, and its choice is not always yours. System Settings → General → Login Items & Extensions → Quick Look lists what is installed; turn off the one you do not want.
The file is enormous. A 30 MB Markdown file — a scraped log, a generated report — will make any renderer think about it. This is rare, but it does happen, and it is usually a sign the file wants less rather than a viewer.
A note on what .md means
There is no single Markdown. John Gruber’s original 2004 syntax had no tables. GitHub Flavored Markdown added tables, task lists, strikethrough and autolinks, and is what most people mean today. CommonMark is the specification that settled the ambiguities in the original. Obsidian, Notion and various static site generators each add their own extensions on top — wiki links, callouts, front matter.
Practically, this means a file written for one tool may render slightly differently in another. Tables and task lists are safe: any tool worth using supports GitHub Flavored Markdown. Wiki links in [[double brackets]] are not: they are an Obsidian idea, and most viewers will show them as literal text.
If you write Markdown that other people will read in other tools, staying inside GitHub Flavored Markdown is the pragmatic choice — and, not coincidentally, it is the dialect that renders identically on GitHub, in most previewers, and in Hem.